Each tour gets its own page on your site. Live tours also show in the Tourfect marketplace, where travellers can search by place and type of tour.
Start a new tour
- In your dashboard, click Tours.
- Click New tour.
On Pro, or with drafts left on Starter, the Write with AI box at the top of the form can draft your tour’s name, description and highlights from a few notes. See Writing with AI.
Add the basics
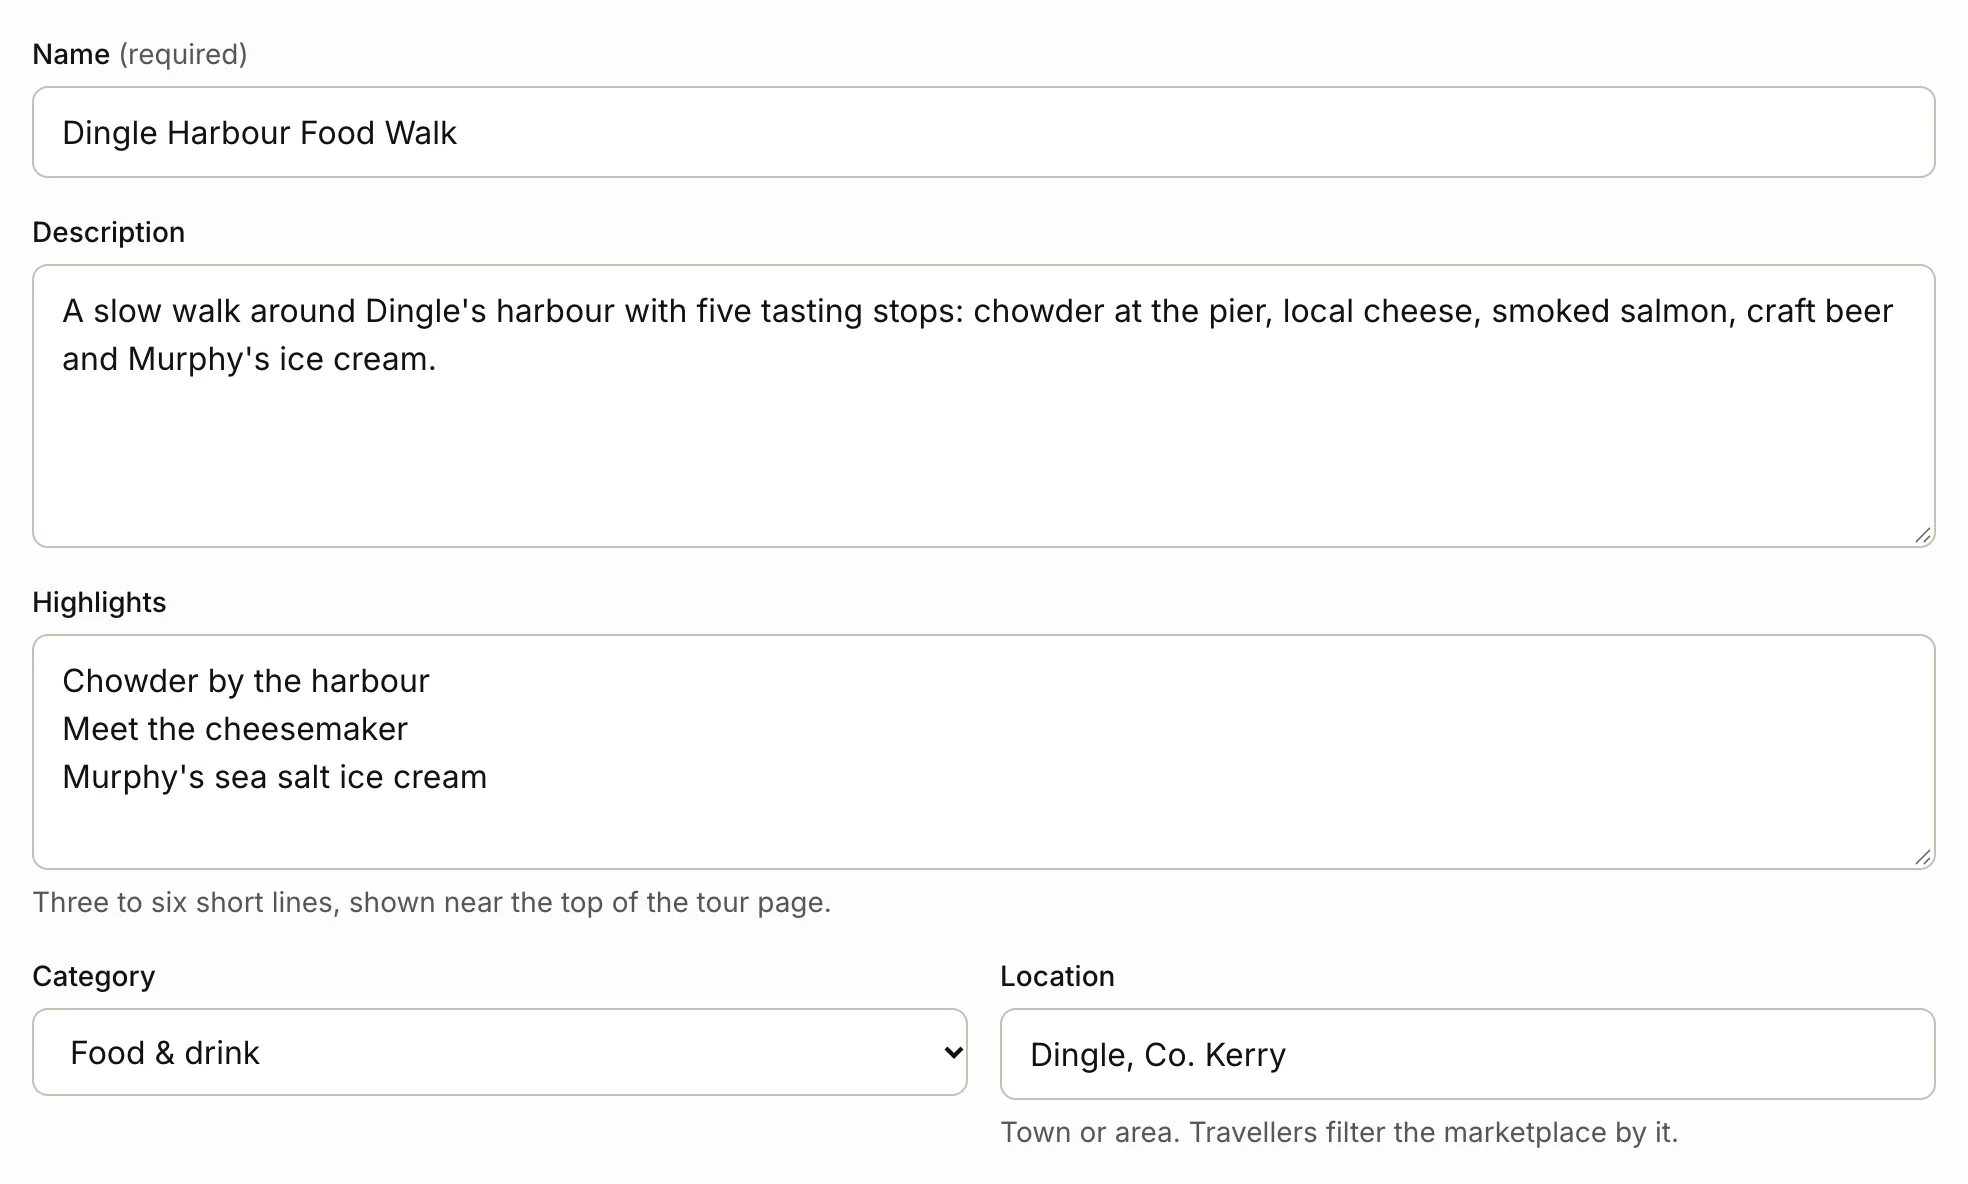
- Type the tour’s Name.
- Write a Description: what happens on the tour and who it suits.
- Type the Highlights, one per line. Three to six short lines work best.
- Choose a Category.
- Type the Location: the town or area. Travellers filter the marketplace by it.
Set the time and price
- Under How long it takes, choose the hours and the minutes.
- If the tour starts at set times, type them in Start times, for example “9:30am, 2pm”. Leave it empty to agree the time with each traveller by email.
- Under How you charge, click Per person or Per group.
- Type the Price.
- Type the Max group size: the most people you take on one tour.
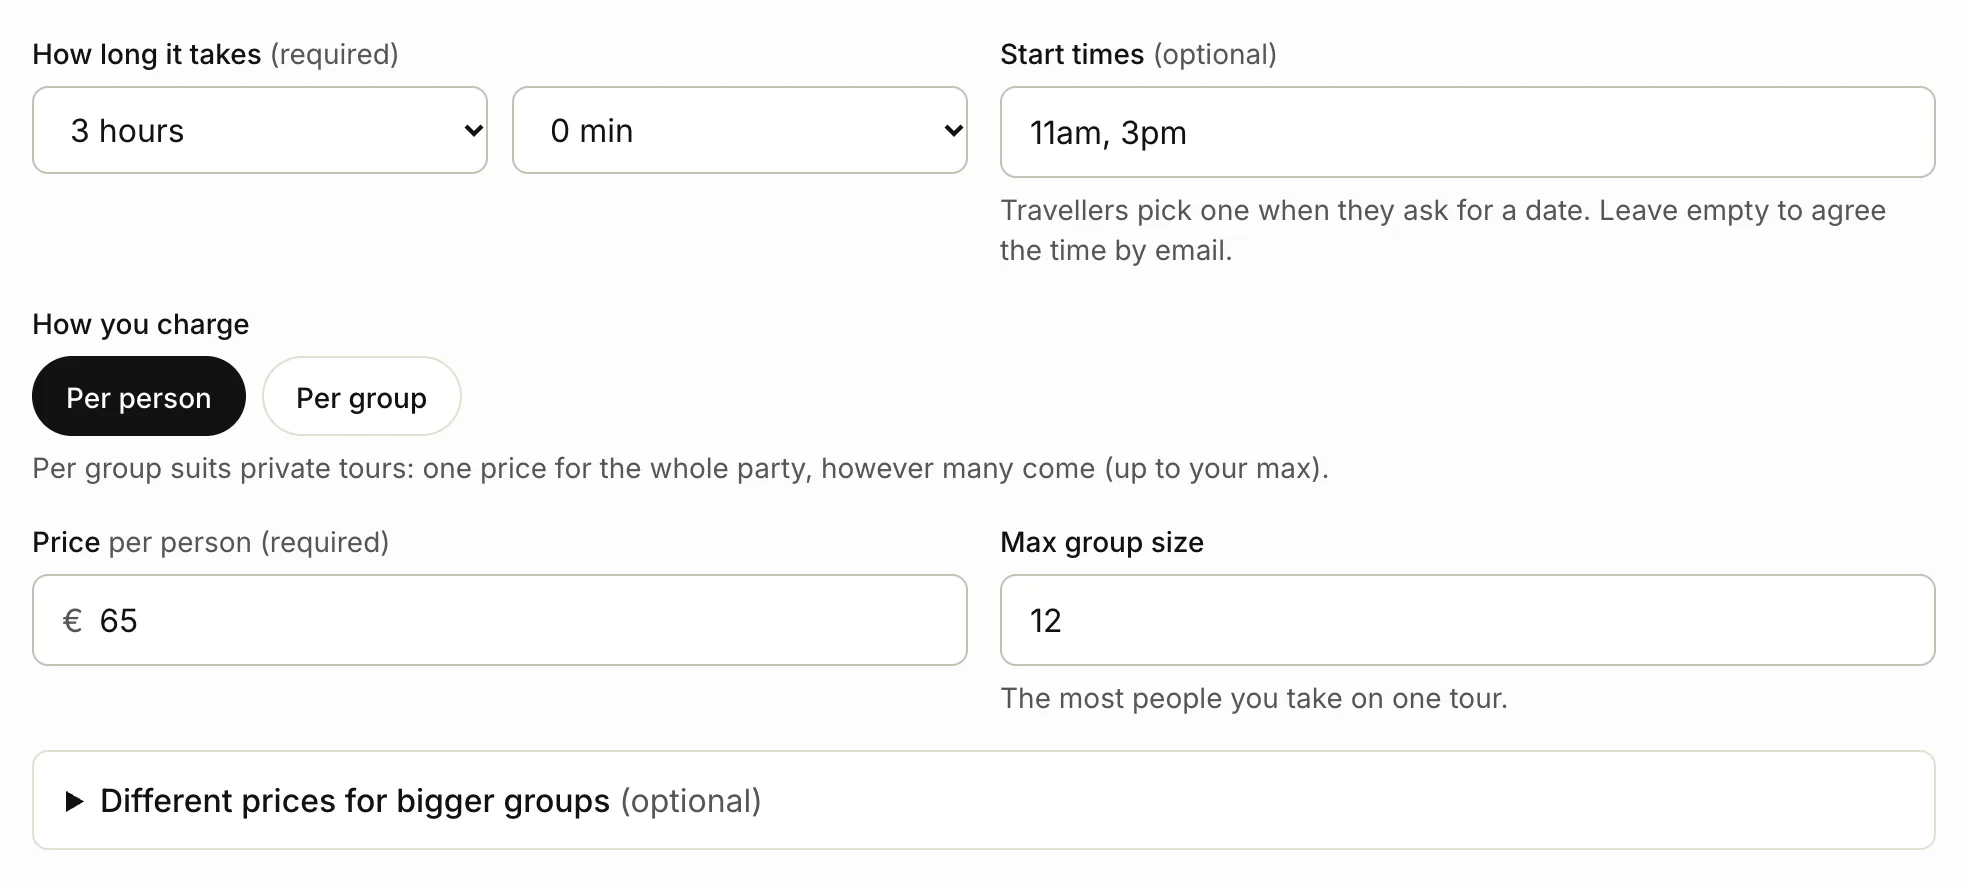
Per group suits private tours: one price for the whole party, up to your max group size. If bigger groups pay a different price, open Different prices for bigger groups and click Add a price for bigger groups. You can add up to 5 of these.
Add the practical details
- Type the Meeting point, for example “Portmagee harbour car park”.
- List What’s included, one item per line.
- List what’s Not included, one item per line.
Add photos
- Under Photos, click Add photos.
- Choose up to 8 photos from your computer or phone.
- If the photos aren’t yours, type a Photo credit (optional), for example “Photo: Jane Doe / Unsplash”.

Photos can be PNG, JPEG or WebP files, up to 5 MB each. Portrait photos (4:5) look best. The first photo is the cover.
Put it live
- Leave Live: show it on your site and in the marketplace ticked. To keep the tour hidden while you work on it, untick it.
- Click Create tour.

Your tour’s page in the dashboard opens with “Tour created.” To see it as travellers do, click View on your site.
Your site goes live when you confirm your email address. Until then, the tour’s page in the dashboard says it’s ready and will go live when you confirm.
Optional: how it looks in Google
Under Search and sharing (optional), you can write a Page title (up to 70 characters) and a Meta description (up to 160 characters). These show in Google results and when someone shares the link. Leave them empty to use the tour’s name and description.
Related articles
- Writing with AI Let AI draft your tour page from rough notes, then check and edit it before you save.
- Set your availability and start times Choose the start times travellers can pick, and mark days sold out or not running.
- Your setup checklist Work through the checklist on your dashboard to get your site ready for bookings.
Still stuck? Contact us
Tell us what you're trying to do and where it went wrong. We reply by email within a working day.
Contact us