Your site has a blog at /blog for stories, tips and news. It stays hidden until you publish your first post. Then Blog joins your site’s menu.
Write a post
- In your dashboard, click Site content.
- Click Blog.
- Click Write a post.
- Type a Title.
- Optional: type a Category (optional), for example “Tips”. It shows on the post and its card, and posts in the same category are suggested together.
- Optional: add a Summary (optional): one or two sentences for the blog list and search results.
- Optional: choose a Cover photo (optional).
- Write your post in the Post box.
- Click Save post.
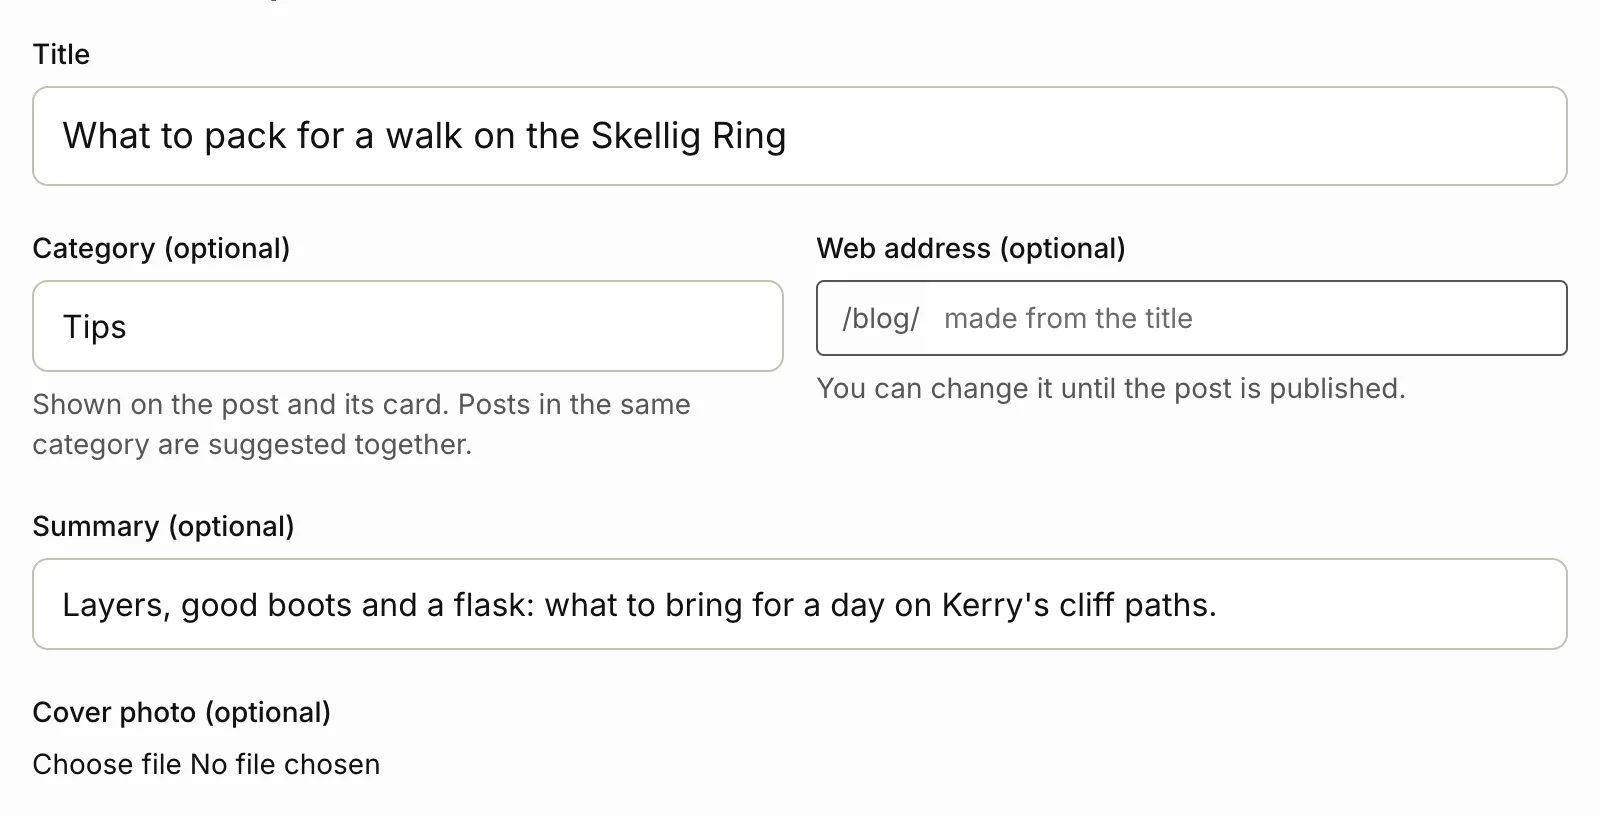
Your post is saved as a draft. Only you can see it until you publish it.
The web address
A post’s address is made from its title, for example /blog/what-to-pack-for-a-cliff-walk. You can change it in Web address (optional) until the post is published. After that it’s fixed, so links to it keep working.
Format your post
Click How to format your post under the Post box for a reminder. In short:
- Leave a blank line between paragraphs.
- Start a line with
##and a space for a section heading, or###for a smaller one. Your post lists its headings at the top as “In this article”. - Start a line with
-and a space for a list. Put**either side of words to make them bold. - Write
[the words to click](https://...)for a link. - Start a line with
>for a tip box, for example> **Local tip** Leave early.
Add photos to a post
- Under Photos in the post, choose one or more photos in Add photos. They must be PNG, JPEG or WebP files.
- Click Save post.
- Each photo now has a line to paste. Click Copy next to the photo you want.
- Paste the line in the Post box where the photo should go.
- In the pasted line, change “Describe the photo” to what the photo shows. This helps people who can’t see it.
- Click Save post.
To take a photo away, tick Remove next to it and click Save post.
Write with AI (Pro)
On Pro and Custom, a Write with AI box above the Post box drafts the post for you.
- Type the post’s Title first.
- Optional: in Write with AI, add notes on what it should cover: facts, places, a tip, a tour to mention.
- Click Write with AI and wait a few seconds.
- Check the draft in the Post box and change anything that isn’t right. To put back what was there before, click Undo.
- Click Save post.
It uses the title, your notes and your tours. You can make up to 20 post drafts an hour and 60 a day. See Writing with AI.
AI can get details wrong. Check names, places and facts before you publish.
Preview and publish
- Click Preview next to Save post to see the post as it will look on your site. It opens in a new tab.
- When it’s ready, tick Published.
- Click Save post.
The post goes on your blog, dated today. To take it off your site, untick Published and click Save post. It goes back to being a draft.
On the Blog list, drafts have a Draft label and a Preview button. Published posts have a View link.

In search results
Under In search results, you can set a Search title and Search description for Google. Both are optional. Left blank, the post uses its title with your business name, and its summary.
Where your posts show
- Your blog page lists your published posts, newest first.
- Each post has its own page, with how long it takes to read, one of your tours and more posts from your blog.
- In the Atlas theme, your home page shows your latest posts. On Pro and Custom you can add them to any theme’s home page with Show blog in Home page sections. See Home page sections.
Delete a post
On the Blog list, click Delete next to the post, then confirm. Deleting can’t be undone. To take a post off your site but keep it, untick Published instead.
Related articles
Still stuck? Contact us
Tell us what you're trying to do and where it went wrong. We reply by email within a working day.
Contact us